Monday, July 31, 2017

A Love Story

There is another great release of new dies over in the online store. The Nested Shapes with 17 designs as well as a Wedding Release with 20 designs. Janet (our video artist) has put together a video showcasing all the new nested shapes dies. Just click on the photo below to be taken to the CottageCutz YouTube channel.

https://www.youtube.com/watch?v=2LOQcFflcIE&feature=youtu.be

I'm showing off several of the new wedding dies  today.  I saw a fold-out card on Pinterest a couple of weeks ago that I thought I could create -- depicting a little love story.  The card I saw on Pinterest was a birthday card; mine is a wedding card, using the following CottageCutz dies:

Pair of Doves
Wedding Chapel
Garden Bride and Groom
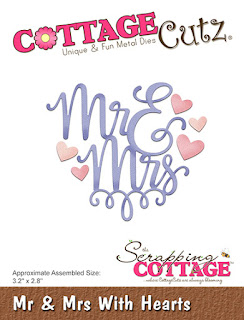
Mr and Mrs with Hearts
Honeymoon Car


There are many panels of cardstock on my card:

White - 5 1/2" x 11 1/2", 2 3/4" x 4 1/4", 3 3/4" x 5", 3" x 4 1/2" (2), 2 1/4" x 3 3/4" (2)
Blue - 4" x 5 1/4", 3 1/4" x 4 3/4" (2), 2 1/2" x 4" (2)
Patterned Paper - 3 5/8" x 2 1/4", 2 7/8" x 1 1/2" (2), 2 1/8" x 1 1/4" (2)


Cut the various die-cut pieces from white, blue, gray, pink, and black cardstock, as shown.


Score the 5 1/2" x 11 1/2" piece of white cardstock at 1/4", 3 3/4", and 7 1/4".


Rotate the cardstock and, with the 1/4" scored side at the top, place it at the 5/8" mark of your paper cutter and cut down to the last score line.  Cut out the 5/8" section, as shown.


Place a strip of 1/8" Scor-tape on one side of the 2 3/4" x 4 1/4" piece of white cardstock and adhere to the 1/4" section.  Trim the excess 1/4" strip at the top, as shown.


Adhere the various pieces of patterned paper to the remaining white panels and run a piece of narrow blue ribbon around the top of the patterned paper, adhering at the back.  Add some color to the die cuts using Copic markers to give some dimension and construct the die-cuts on the white panels. (As I was constructing the chapel, I decided that I needed a couple of yellow pieces for the windows.)  Then adhere the white panels to the blue panels.


Stamp the small sentiments to several of the panels and adhere to the card base.  Add some pearls throughout.


CottageCutz dies used on my card are:

http://www.scrappingcottage.com/cottagecutzpairofdoves.aspx

http://www.scrappingcottage.com/cottagecutzweddingchapel.aspx

http://www.scrappingcottage.com/cottagecutzgardenbrideandgroomelites.aspx

http://www.scrappingcottage.com/cottagecutzmrandmrswithhearts.aspx

http://www.scrappingcottage.com/cottagecutzhoneymooncar.aspx


Thursday, July 27, 2017

CCEE 1730 Walk on Stilts Day

Maryann ends her month as hostess for the CCEE Stampers by asking us to make a tall thin card -- in honor of Walk on Stilts day.   I used some Heartfelt Creations images to create my tall undersea card.  The seahorse and small fish were stamped on shrinkable plastic and shrunk down with my heat tool.  This card will fit into a #10 legal-sized envelope.


Stop over at the CCEE Stampers blog to see some more tall, thin cards.

Monday, July 24, 2017

Two Doves

As I mentioned last week, CottageCutz has two new die collections -- a wedding collection and a nesting shapes collection.  I'm using a die from each set this week for my monochromatic card.


To start my card, I cut two pieces of white cardstock -- 5 1/2" x 8 1/2" (scored at 4 1/4") and 3 7/8" x 4 1/8", and one piece of black cardstock 4" x 5 1/4"; as well as a piece of patterned paper 2 7/8" x 3 7/8".


Next I cut the Stitched Eyelet Rectangle panel, using the largest die in the set, and the Two Doves die-cuts from white and black cardstock.


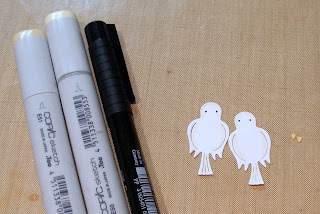
Using some ivory Copic markers and a black pen, I added some accents to the doves.


I wanted the doves to be raised from the card, so I placed some foam dots on the backs of them . . .


. . . and adhered the bird stand and doves onto the patterned paper, which had been glued to the black panel.  Sometime ago I bought a package of wedding paper, which also included some tags.  I adhered one of the small tags to the top corner.


I ran the 3 7/8" x 4 1/8" piece of white cardstock through my Cuttlebug using an embossing folder with a similar pattern as that on the patterned paper; then I constructed the card base.


I glued down the finished eyelet panel at an angle, and my card was finished.


CottageCutz dies used on this card are:

http://www.scrappingcottage.com/cottagecutzpairofdoves.aspx

http://www.scrappingcottage.com/cottagecutznestedstitchedeyeletrectangleset.aspx


Thursday, July 20, 2017

CCEE1729 Moon and Space Exploration Day

Maryann continues as our hostess of the CCEE Stampers for the month of July.  She mentioned a good celebration for today, July 20.  It's Moon Day and Space Exploration Day, so she asked us to use this theme to inspire our cards this week.  I confess:  I'm a Star Wars junkie!  (I saw Episode VII five times in the theater and bought the DVD to add to the rest of them in my collection!)   So I jumped into this challenge feet first.  I saw a really cool technique for the galaxy background on You-Tube several weeks ago, and I've already made three cards using it.  I used it again today with a cute set of stamps from a new-to-me company, Kindred Stamps.  The set is called Galactic Adventure -- very appropriate for today's celebrations.  Here's my card:


Check out the CCEE Stampers blog to see how the rest of the team is celebrating outer space.

Monday, July 17, 2017

Wedding Diorama

We're really excited over at CottageCutz.  Two new die collections have just been released, and you can see them on the website.  The first collection is a series of wedding dies -- both elegant and whimsical.  The second collection contains nested shapes -- squares, circles, rectangles and ovals -- in both stitched and eyelet designs.  My card today was made using dies from both collections.  It is a diorama card.


To start my card I cut two panels of pink cardstock 4 1/4" x 9 1/2" and one panel of cream cardstock 4 1/4" x 7 1/2", as well as two pieces of wedding patterned paper  4" x 5 1/4" and one piece 4 1/4" x 5 1/2".


I scored the pink cardstock at 2" in from each side and the cream cardstock 1" in from each side.  Then I centered the patterned paper.  The 4 1/4" x 5 1/2" piece was adhered to the cream piece; the other two identical pieces were adhered to the pink pieces.


Fold on the score lines as follows:  one piece of pink and the one piece of cream were folded with the tabs going toward the back of the card; the other piece of pink has the tabs folded toward the front of the card.

Using the largest stitched scalloped rectangle die, I cut an opening in the front panel.  Using the second largest double-stitched rectangle die, I cut an opening in the center, cream panel.   I did not use these cut-out panels on my card, so I can save them for other projects where the stitching will then show. 


I then cut the bride and groom pieces from white, black and silver cardstock/paper.


I colored the skin and hair with markers . . .


. . . and constructed them on the back panel.


As I usually make up my designs as I go along, at this point I decided that I would probably need to embellish my card a bit; so I cut some additional die-cuts.


I had tried to cut the wedding bells from the same silver glittery paper I used to cut the background for the bridal gown, but the cuts were too intricate for that paper.  So I just cut it from silver paper and brushed some clear Wink of Stella over them to give them the same sparkly look.

Then I constructed my card.  I applied glue to the outsides of the tabs on the center panel and glued it to the tabs on the back panel.  I added the wedding bells and bow to the center panel.


Then I applied glue to the insides of the tabs on the front panel and completed the card.  I added the "celebrate" to the bottom of the front panel.


Here is a close-up looking into the card.


This card will lie flat for mailing; however, a custom-sized envelope will be necessary as the card measures 4 1/4" x 7 1/2" when it lies flat.

I decided to make another, simple card using the cut-out portions from my diorama.  I cut another panel with the Nested Stitched Scallop Rectangle die to match the cut-out portion from the front of my first card.  After carefully removing the patterned paper from the pink panel, I adhered it to the black panel and mounted the smaller rectangle from the center panel on top.  Then I die-cut the Mr and Mrs sentiment and glued it to the front and added some red hearts (also from the Mr and Mrs die).  I adhered this to a white card base and added some light accents with a white gel pen.   Voila!  Another card!


CottageCutz dies used on this card are:

http://www.scrappingcottage.com/cottagecutzelegantbrideandgroom.aspx


http://www.scrappingcottage.com/cottagecutzweddingbellswithbow.aspx


http://www.scrappingcottage.com/cottagecutznestedstitchedscalloprectangleset.aspx


http://www.scrappingcottage.com/cottagecutzdouble-stitchedrectanglesetbasics.aspx

http://www.scrappingcottage.com/cottagecutzexpressionscelebrate.aspx


http://www.scrappingcottage.com/cottagecutzmrandmrswithhearts.aspx


Thursday, July 13, 2017

CCEE1728 International Rock Day

Maryann continues as hostess for the CCEE Stampers, and she tells us that today is International Rock Day.  In honor of that, she asked the team members to use the colors of stone (greys, brown, black, white) on our cards.  I'm using a new layering stamp set for my card.  I'm not as good as another team member, Lynn McAuley, with layering; but I have found that the MISTI is a great help with this technique.


Stop over at the CCEE Stampers blog to see how the other team members handled these neutral colors on their cards.

Monday, July 10, 2017

Prayers

My card today could cover several needs.  I am part of a group of ladies at my church called Prayer Angels.  We each pick a name of one of the group out of a hat and become that person's "Prayer Angel."  We offer prayers for her throughout the year and send cards of encouragement.  A card similar to this one would fill the bill perfectly.  Or . . . it could be used as a sympathy card.   Unfortunately, we all need those occasionally.  I used three different CottageCutz dies on this card, including one of the new Expressions Plus dies.


To begin my card I cut a piece of purple cardstock 5 1/2" x 8 1/2", scoring it at 4 1/4".  I also cut a piece of green cardstock 4" x 5 1/4" and a piece of coordinating pattern paper 3 7/8" x 5 1/8".


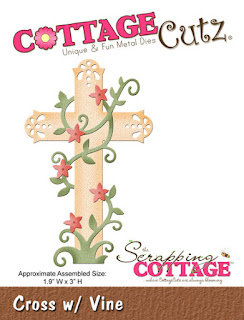
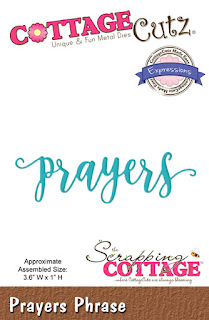
Then I cut the cross/vine, the Prayers phrase, and the rounded rectangle panel from various colored cardstock.


Using Ranger Distress inks (Bundled Sage and Antique Linen) as well as a dark yellow Copic marker, I added some dimension to the die-cuts.


I then constructed my cross and vine, attaching the flowers with mini brads.


Because I was going to stamp an additional sentiment in black ink, I decided to shadow my "Prayers" Expressions Plus sentiment with black.  To make the adherence process easier, I had run the panels of cardstock through my Xyron X sticker maker prior to cutting out the words.


I then stamped the small sentiment in the lower right-hand corner of the pale green rectangle, added the cross/vine, which were popped up with foam tape, and constructed the rest of my card.


CottageCutz dies used on this card are:

http://www.scrappingcottage.com/cottagecutzcrosswvine.aspx

http://www.scrappingcottage.com/cottagecutzexpressionsplusprayersphrase.aspx


http://www.scrappingcottage.com/cottagecutzroundedrectanglesetbasics.aspx